
🏠 Home > 🗺️ Recipes > 🍱 Snacks > 🇬🇲 Gambia Snacks > 🍱 Fluffy Puff Puff (Bofrot) , Savoury Akara (Bean Fritters) , Creamy Chura Gerrte (Peanut & Rice Porridge)
🍱 Taste the Smiling Coast: 3 Unforgettable & Easy Gambian Snacks for Your Kitchen
Published by Supakorn | Updated: February 2026
🌍 Introduction: The Heartbeat of Gambian Street Food
Hey there, food adventurers! When most people talk about Gambian cuisine, they immediately jump to the big players: the rich peanut stews like Domoda or the legendary rice dish, Benachin (Jollof). And while those dishes are certainly magnificent, the true soul of Gambian food—the warm, immediate, and utterly delicious goodness—is found in its snacks and street food.
Imagine walking through a bustling market in Banjul or Serrekunda; the air is thick with the aroma of spices and frying dough. These quick bites are more than just food; they are social connectors, a quick breakfast, a late-afternoon energy boost, and the perfect companion to a strong cup of attaya (green tea).
Good news: you don't need a ticket to West Africa to experience this joy! We've hand-picked three of the most iconic and easy-to-master Gambian snack recipes. They are simple to prepare, use common ingredients, and deliver complex, comforting flavours. This guide is your passport to making them at home, whether you're a seasoned cook or a total beginner.
We’re going to dive deep into:
1.Fluffy Puff Puff (Bofrot): The irresistible sweet, yeasted dough balls.
2.Savoury Akara (Bean Fritters): Protein-packed, crispy, and spicy black-eyed pea cakes.
3.Creamy Chura Gerrte (Peanut & Rice Porridge): The comforting, wholesome breakfast or dessert.
Ready to bring the flavour of The Smiling Coast into your kitchen? Let's get started!

🍩 Recipe 1: Fluffy Puff Puff (Bofrot) - West African Dough Balls
💡 About this Recipe
Puff Puff (known as Bofrot in Ghana, and often called Akara or just "fried dough" in parts of The Gambia) is the ultimate West African comfort snack. Think of it as a delicious hybrid between a doughnut and a beignet: a slightly crisp exterior giving way to a light, pillowy, and airy interior. Sold on almost every street corner, this yeasted, deep-fried dough ball is simple yet deeply satisfying. It's lightly sweetened, often flavoured with a hint of nutmeg, and incredibly addictive—perfect for a sweet treat with tea or coffee.
📜 Ingredients & Measurements
Get ready to mix up this simple, classic batter:
- 2 cups All-Purpose Flour
- 1/2 cup Granulated Sugar (adjust to your preference)
- 1 Teaspoon Ground Nutmeg (don’t skip this!)
- 1 Teaspoon Salt
- 2 1/4 Teaspoons (1 packet) Active Dry Yeast
- 1 1/2 cups Lukewarm Water (Crucial for activating the yeast)
- Vegetable Oil or Peanut Oil for deep frying (about 4 cups)
🧑🍳 Step-by-Step Instructions
1.Activate the Yeast: In a small bowl, whisk the yeast and about 1/4 cup of the lukewarm water. Let it sit for 5-10 minutes until it becomes foamy. This confirms your yeast is active!
2.Mix Dry Ingredients: In a large mixing bowl, combine the Flour, Sugar, Nutmeg, and Salt. Give it a good whisk to distribute the yeast.
3.Combine and Form Batter: Add the activated yeast mixture and the remaining water to the dry ingredients. Mix everything thoroughly. You are aiming for a thick, slightly elastic batter—thicker than a pancake batter but thinner than bread dough. If it's too thick, add water, a tablespoon at a time; if too thin, add a tablespoon of flour.
4.Proof (Rise): Cover the bowl with a clean kitchen towel or plastic wrap. Place it in a warm, draft-free spot (like a slightly warmed-up oven that has been turned off) and let the batter rise for 1 to 1.5 hours, or until it has roughly doubled in size. This step is essential for achieving the fluffy texture.
5.Heat the Oil: Fill a deep, heavy-bottomed pot with about 2-3 inches of oil. Heat the oil to around 350°F (175°C).
6.Fry the Puff Puff: Using the "hand method" (clench your fist, squeeze batter into a ball between your thumb and forefinger, and drop it into the oil) or two spoons, drop tablespoons of the batter into the hot oil. Do not overcrowd the pot.
7.Cook: Fry for 3-5 minutes, turning them frequently with a slotted spoon or spatula, until they are evenly golden brown and puffed up.
8.Drain and Serve: Remove the Puff Puff with a slotted spoon and transfer them to a plate lined with paper towels to drain excess oil. Dust with extra sugar or cinnamon (optional) and serve immediately while warm!
❌ Tips & Mistakes to Avoid
- Mistake: Oil is Too Cold: If the oil isn't hot enough, the Puff Puff will absorb too much oil and turn greasy and heavy. Make sure it sizzles immediately when the batter is added.
- Mistake: Oil is Too Hot: If the oil is too hot, the outside will burn before the inside is cooked through. Use a thermometer or test with a small drop of batter (it should float and bubble gently).
- Tip: The Nutmeg Factor: Nutmeg is the signature spice here. Use freshly grated nutmeg if you can—it makes a world of difference to the aroma and taste!
- Tip: Don't Stir After Rising: Once the batter has risen, handle it as little as possible. If you stir vigorously, you will knock out all the air, and your Puff Puff will come out flat and dense.
❓ FAQ
Q: Why isn't my batter rising?
A: The water was either too cold (yeast is sleepy) or too hot (yeast died). Ensure your water is just lukewarm (about 105-115°F/40-46°C). Your rising spot may also be too cold—find a warmer place.
Q: Can I use instant yeast?
A: Yes, you can. You can skip the first activation step and mix it directly with the dry ingredients.
Q: How do I store leftovers?
A: Puff Puff is definitely best fresh. If you have leftovers, store them in an airtight container at room temperature for up to 2 days, and warm them up in an oven or air fryer to regain some crispness.
📝 Summary
Puff Puff is the quintessential West African snack—easy to make, cheap, and universally loved. This sweet, light, and airy fried dough is the perfect starting point for exploring Gambian street food and sharing a little warmth with friends.

🌶️ Recipe 2: Savoury Akara (Bean Fritters)
💡 About this Recipe
Akara (also called Bean Cakes or Bean Fritters) is one of the most popular street foods across West Africa, and The Gambia is no exception. It's often enjoyed for breakfast, sometimes tucked inside Tapalapa bread, or served as a savoury, protein-rich snack. Akara is essentially a simple batter made from peeled, blended black-eyed peas, onions, and often a hit of spicy pepper, which is then deep-fried until golden and crispy. It’s naturally gluten-free and incredibly filling, making it a fantastic alternative to flour-based snacks.
📜 Ingredients & Measurements
Focus on quality black-eyed peas for the best texture:
- 1 cup Dried Black-Eyed Peas (or Honey Beans)
- 1/2 Medium Onion, roughly chopped (for blending)
- 1/4 Small Red Bell Pepper (optional, for colour)
- 1/2 Scotch Bonnet or Habanero Pepper (or less, to taste), seeds removed
- 1/2 Teaspoon Salt
- 1/2 Teaspoon Bouillon Powder or Cube (such as Maggi, crushed)
- 2 Tablespoons Water (only if needed for blending)
- Vegetable Oil or Peanut Oil for deep frying
🧑🍳 Step-by-Step Instructions
1.Soak and Peel the Beans (The Hard Part!): Soak the black-eyed peas in cold water for at least 2 hours (or overnight is best). The skin should wrinkle. The crucial step is peeling: rub the beans vigorously between your palms under running water to loosen the skins. Drain the skins and repeat the process until most of the beans are peeled (white/cream-coloured). This process is key for a light and fluffy fritter.
2.Blend the Batter: Drain the peeled beans. In a blender or food processor, combine the peeled beans, the roughly chopped Onion, Red Bell Pepper, and Scotch Bonnet pepper. Blend until you have a smooth, thick paste. Add water very sparingly (a tablespoon at a time) only if the blender struggles. The batter must be thick—like a very heavy cake batter.
3.Whip the Batter: Transfer the batter to a mixing bowl. This is a crucial step for aeration! Using a whisk, hand mixer, or electric mixer, whip the batter for 3-5 minutes. It should become visibly lighter in colour, fluffier, and increase slightly in volume. This creates the light, soft interior texture.
4.Season: Stir in the Salt and Bouillon Powder. Taste and adjust seasoning.
5.Heat the Oil: Heat about 2 inches of oil in a deep pot to 350°F (175°C).
6.Fry the Akara: Using a small spoon, carefully drop spoonfuls of the batter into the hot oil. Fry for 2-3 minutes per side until they are golden-brown and crispy.
7.Drain and Serve: Remove the Akara with a slotted spoon and place them on paper towels to drain the excess oil. Serve immediately!
❌ Tips & Mistakes to Avoid
- Mistake: Not Peeling the Beans: If you don't peel the skins, your Akara will be tough, dark, and not fluffy inside. The fluffiness depends on a smooth, clean batter.
- Tip: Don't Use Too Much Water: The thinner the batter, the greasier and flatter the Akara will be. Resist the urge to add more water to make blending easier.
- Tip: Aerate, Aerate, Aerate: The whipping/mixing step is what makes the Akara light and porous. This is the difference between a dense ball and a fluffy fritter.
- Tip: Pairing: Akara is traditionally served with a simple chili sauce, fresh bread (Tapalapa), or a side of creamy ogi (fermented corn porridge).
❓ FAQ
Q: Can I use canned black-eyed peas?
A: It is highly discouraged. Canned beans are too soft and will result in a mushy, waterlogged batter that won't crisp up properly. Use dried beans and soak them.
Q: What if I don’t have a high-powered blender?
A: You can use a food processor, but you will need to scrape down the sides often. The main goal is a smooth, thick paste.
Q: How spicy is it?
A: The recipe calls for a Scotch Bonnet, which is very hot. If you prefer mild, substitute the pepper with a small slice of red bell pepper, or omit the pepper altogether for a simple savoury flavour.
📝 Summary
Akara is a powerhouse snack: protein-packed, flavourful, and surprisingly simple once you get the peeling down. It’s a savoury, spicy, and satisfying treat that is a true staple of West African cuisine.
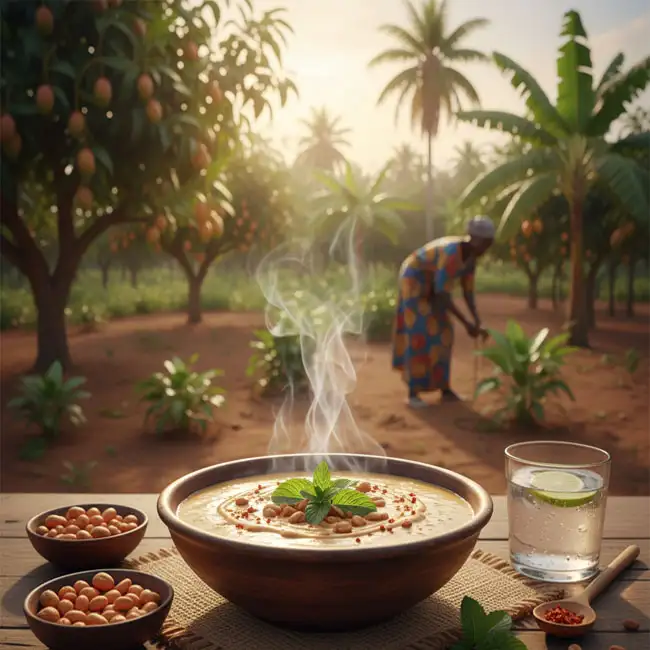
🥣 Recipe 3: Creamy Chura Gerrte (Peanut & Rice Porridge)
💡 About this Recipe
Chura Gerrte (also known as Chura or Churra Gerrteh) is a comforting and highly nutritious porridge that’s widely eaten for breakfast or a light dinner in The Gambia. Its name literally translates to "rice and groundnut (peanut)." Unlike a lot of sweet porridges, Chura Gerrte has a wonderful, nutty depth thanks to the ground peanuts, which cook down with the rice to create an incredibly thick, smooth, and hearty texture. It’s naturally wholesome and customizable with your favourite toppings, from sugar and condensed milk to yogurt and fresh fruit.
📜 Ingredients & Measurements
Simple ingredients, deep flavour:
- 1/2 cup Uncooked White Rice (Jasmine or short-grain works well)
- 1 cup Ground Raw Peanuts (or fine, unsweetened peanut flour)
- 5 cups Water (or a mix of water and milk)
- 1/4 Teaspoon Salt
- 1/4 Teaspoon Ground Nutmeg or Cinnamon (optional, for flavour)
- Toppings (to serve): Granulated Sugar, Sweetened Condensed Milk, or Plain Yogurt.
🧑🍳 Step-by-Step Instructions
1.Prep the Core: If using whole raw peanuts, you must grind them first. Pulse them in a food processor until they are finely ground, like a coarse flour. Be careful not to turn it into peanut butter.
2.Make the Base: In a medium-sized pot, combine the Ground Peanuts, the Uncooked Rice, the 5 cups of Water (or water/milk mix), Salt, and Nutmeg/Cinnamon (if using).
3.Bring to a Boil: Turn the heat to high and bring the mixture to a rolling boil, stirring frequently to prevent the peanut-rice mixture from sticking to the bottom.
4.Simmer and Thicken: Once boiling, reduce the heat to low. The key to Chura Gerrte is patient, continuous stirring. Simmer for 20-30 minutes, stirring every few minutes. The rice will cook down, and the porridge will thicken significantly as the starch and ground peanuts release their oils.
5.Check Consistency: The porridge is ready when the rice is very soft, the mixture is thick (it should coat the back of a spoon), and you might even see a light layer of peanut oil on top. If it’s too thick, add a little extra water or milk.
6.Serve: Ladle the hot porridge into bowls. Serve immediately, allowing each person to customize their bowl with generous amounts of Sugar, Sweetened Condensed Milk (very traditional!), or a dollop of cold Yogurt for a creamy contrast.
❌ Tips & Mistakes to Avoid
- Mistake: Not Stirring: The peanut and rice mixture easily settles and burns at the bottom of the pot. Stirring is mandatory to prevent this and ensure a smooth porridge.
- Tip: The Grinding: The texture depends on finely ground peanuts. If you use chunky peanut butter, the result will be oily and sticky, not smooth. Stick to ground raw peanuts or fine peanut flour.
- Tip: Using Leftover Rice: You can adapt this using leftover cooked rice, but you'll need to use less water, and the overall cooking time will be reduced. You will also miss some of the starch that helps create that signature thickness.
- Tip: Use for Meal Prep: You can cook a big batch and store it in the fridge for up to 3 days, reheating portions with a little extra milk or water to restore the consistency.
❓ FAQ
Q: Can I use roasted peanuts instead of raw?
A: Yes, but raw peanuts are traditional. If using roasted, use unsalted ones and ensure they are ground very finely. The flavour will be slightly deeper and less mild.
Q: What is the authentic way to sweeten it?
A: Sweetened Condensed Milk is the most authentic choice, as the richness and creaminess complement the earthy peanut flavour perfectly.
Q: Is this considered a dessert or a meal?
A: It is a flexible dish. Served plain or with just salt and a little condensed milk, it's a filling, popular breakfast. Served with extra sugar, fruit, and yogurt, it’s a wholesome dessert.
📝 Summary
Chura Gerrte is the ultimate Gambian comfort in a bowl. It’s a warm, creamy, and nourishing porridge that offers a simple, comforting, and deeply satisfying way to start the day or wind down after a long one.
✨ Final Thoughts: Your New West African Snack Obsession
You've made it! You now have three amazing, no-fuss recipes that pull back the curtain on the vibrant street food culture of The Gambia. From the market stalls to your own home kitchen, these snacks—Puff Puff, Akara, and Chura Gerrte—offer a delicious and accessible way to explore one of West Africa’s most celebrated cuisines.
The great thing about these recipes is their simplicity. They prove that you don't need a huge grocery list or professional culinary skills to produce authentic, jaw-dropping results. Each snack uses basic techniques (mixing, frying, stirring) that anyone can master.
Your final challenge is simple: Don't try to make all three at once! Pick the one that excites you most and give it a go.
- Need a sweet fix? Start with Puff Puff.
- Want a savoury, protein-rich treat? Go for Akara.
- Need a unique, comforting breakfast? Whip up some Chura Gerrte.
We encourage you to try them, put your own spin on the spice level, and then share your experience! Tag us, comment below, or send us a photo. There's nothing better than sharing the joy of West African flavours. Happy cooking!
| 🇬🇲 🍱 < Back |