
🏠 Home > 🗺️ Recipes > 🍨 Desserts > 🇳🇿 New Zealand Desserts > 🍨 1.The Pavlova (The Classic New Zealand Pavlova) , 2.Hokey Pokey (Honeycomb) , 3.Lolly Cake (Traditional New Zealand Lolly Cake)
🍨 A Taste of Aotearoa: Iconic Sweet Treats from New Zealand
Published by Supakorn | Updated: February 2026
Hey there, sugar lovers! If you have a sweet tooth that’s always looking for the next big adventure, you are in for a serious treat. Today, we’re heading to the rolling green hills and stunning coastlines of New Zealand—but we aren't just going for the views. We’re going for the desserts.
New Zealanders (or "Kiwis," as we like to call ourselves) have a very special relationship with sugar. Because the country has such incredible dairy—think rich, creamy milk and butter from grass-fed cows—their desserts are on a whole other level of decadence. From school bake sales to fancy Christmas dinners, these sweets are the heartbeat of Kiwi hospitality.
In this guide, I’m going to share with you three of the most legendary, "must-try" dessert recipes that define New Zealand culture. These recipes have gained massive popularity overseas because they bring a bit of sunshine and joy to any table. Best of all? They are super easy to make at home. Let’s get our aprons on!
🥧 Introduction: The Kiwi Sugar Rush
Before we get to the mixing bowls, let's talk about why these three recipes were chosen. They represent the three pillars of Kiwi sweetness:
🌻 • Recipe 1.The Pavlova (The Classic New Zealand Pavlova): The sophisticated queen of the dinner party.
🌻 • Recipe 2.Hokey Pokey (Honeycomb): The crunchy, golden magic found in every Kiwi pantry.
🌻 • Recipe 3.Lolly Cake (Traditional New Zealand Lolly Cake): The nostalgic, colorful treat of every childhood birthday.
I’ve simplified these so you can get authentic results without needing a professional pastry degree. Ready? Let's go!
☁️ Recipe 1: The Pavlova (The Classic New Zealand Pavlova)
🍓 About this Recipe
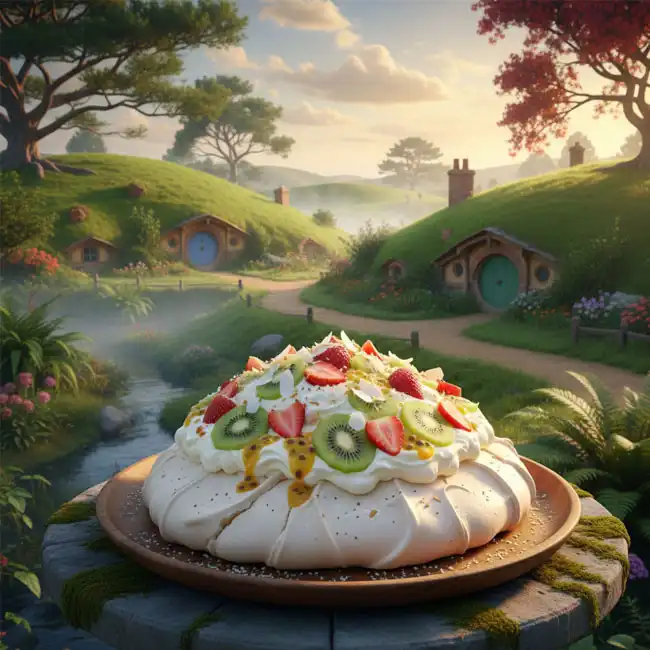
The Pavlova is the crown jewel of New Zealand desserts. It is essentially a giant meringue cake. But don't be tempted to compare it to those hard, dry meringues! A true Kiwi Pavlova has a delicate, crisp outer shell that shatters beautifully, revealing a center that is soft, white, and marshmallowy. It is traditionally topped with a mountain of whipped cream and fresh fruit (usually kiwi and strawberries) to balance the sweetness.
🧂 Ingredients & Measurements
• 6 Large Egg Whites (must be at room temperature)
• 1 1/2 cups Superfine (Caster) Sugar
• 1 teaspoon Vanilla Extract
• 1 teaspoon White Vinegar
• 1 tablespoon Cornstarch
• 2 cups Heavy Whipping Cream (for the topping)
• 2 tablespoons Powdered Sugar (to sweeten the cream)
• 2 Fresh Kiwi fruits (sliced)
• 1 cup Fresh Strawberries (halved)
👨🍳 Step-by-Step Instructions
1.Prep the Oven: Preheat your oven to 302°F / 150°C. Line a baking sheet with parchment paper. Draw a 20cm circle on the paper as a guide, then flip the paper over.
2.Whisk the Whites: In a very clean glass bowl, beat the egg whites until soft peaks form.
3.Add Sugar Slowly: Add the sugar one tablespoon at a time while beating on high speed. Continue until the mixture is thick, glossy, and you can’t feel any grit when rubbing the mix between your fingers.
4.Fold in Stabilizers: Gently fold in the vanilla, vinegar, and cornstarch with a spatula.
5.Shape: Pile the mixture onto your parchment circle. Use a spatula to create a flat top and smooth the sides.
6.The Bake: Place in the oven and immediately turn the heat down to 248 degrees Fahrenheit / 120 degrees Celsius. Bake for 90 minutes.
7.Cooling: Turn off the oven and let the Pavlova cool completely inside with the door slightly ajar. This prevents it from collapsing!
8.Decorate: Once stone cold, top with whipped cream and your fresh fruit.
🚫 Tips & Mistakes to Avoid
• The "No Fat" Rule: Ensure your whisk and bowl are perfectly clean. Even a tiny speck of egg yolk or oil will prevent the whites from fluffing up.
• Superfine Sugar: Use caster sugar. Regular granulated sugar is too heavy and won't dissolve properly, leading to "weeping" (sugar syrup leaking out).
• Patience is Key: Never take the Pavlova out of the oven while it's hot. The sudden temperature change will cause it to crack and sink.
❓ FAQ
Q1.Why did my Pavlova turn yellow?
Your oven was likely too hot. Every oven is different, so if yours runs hot, try baking at 230∘F or 110∘C instead.
Q2.Can I make it the night before?
Yes! In fact, it's better to bake it the night before and let it cool in the oven overnight.
📝 Summary
The Pavlova is a showstopper. It’s light, airy, and the perfect end to any meal. It’s a literal piece of New Zealand history on a plate!

🍯 Recipe 2: Hokey Pokey (Honeycomb)
🐝 About this Recipe
If you ask any Kiwi child what their favorite flavor is, they will say "Hokey Pokey." Before it was an ice cream flavor, it was this standalone candy. Hokey Pokey is a golden, aerated honeycomb toffee. The "magic" happens when you add baking soda to boiling sugar syrup—it foams up like a volcano! It’s crunchy, deeply caramelized, and incredibly addictive.
🧂 Ingredients & Measurements
• 5 tablespoons White Sugar
• 2 tablespoons Golden Syrup (This gives the authentic flavor!)
• 1 teaspoon Baking Soda
👨🍳 Step-by-Step Instructions
1.Prep the Tray: Line a small heat-proof tray with non-stick baking paper.
2.Melt: Put the sugar and golden syrup into a small saucepan. Heat gently, stirring constantly until the sugar has completely dissolved.
3.Boil: Turn up the heat slightly and bring to a boil. Let it simmer for about 2 minutes. Do not stir it during this part!
4.The Volcano: Remove the pan from the heat. Quickly add the baking soda and whisk for just a few seconds. The mixture will instantly foam up.
5.Set: Immediately pour the foaming mixture onto your tray. Do not spread it—let it flow naturally to keep the air bubbles inside.
6.Break: Let it cool and harden for 30 minutes. Once set, break it into nuggets.
🚫 Tips & Mistakes to Avoid
• Fresh Baking Soda: If your baking soda is old, your Hokey Pokey will be a flat, hard rock instead of a light honeycomb.
• Don't Over-whisk: Whisking the foam too much will pop the bubbles, making the candy dense.
• Storage: Put it in an airtight container the moment it is cool. Humidity is the enemy of Hokey Pokey!
❓ FAQ
Q1.What if I don't have Golden Syrup?
You can use honey, but it will have a much stronger "floral" taste rather than the classic "toffee" taste.
Q2.How do I clean the pan?
Soak the pan in hot water; the hardened sugar will melt away easily.
📝 Summary
Hokey Pokey is pure kitchen science. It’s a fast, 3-ingredient wonder that tastes like a professional treat. It's the perfect gift or ice cream topping!
🍬 Recipe 3: Lolly Cake (Traditional New Zealand Lolly Cake)
🌈 About this Recipe
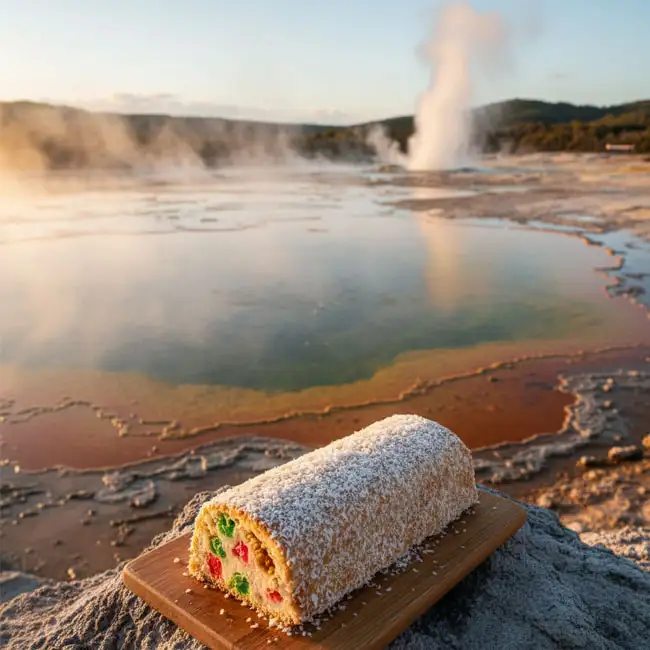
This is the ultimate "No-Bake" New Zealand icon. You will find Lolly Cake in almost every bakery and school gala across the country. It is a dense, fudge-like log made from crushed biscuits and firm marshmallows. It’s bright, fun, and takes only 15 minutes of work.
🧂 Ingredients & Measurements
• 250 grams Malt Biscuits (or any plain, hard biscuit)
• 1/2 cup Unsalted Butter (melted)
• 1/2 cup Sweetened Condensed Milk
• 180 grams Firm Fruit Marshmallows (cut into bite-sized chunks)
• 1/2 cup Desiccated Coconut (for coating)
👨🍳 Step-by-Step Instructions
1.Crush: Pulse the biscuits in a food processor until they are fine crumbs with a few small chunks for texture.
2.Chop: If your marshmallows are large, cut them into pieces the size of a grape.
3.Mix Liquids: In a large bowl, stir the melted butter and sweetened condensed milk until combined.
4.Combine All: Add the biscuit crumbs and the chopped marshmallows. Mix with a wooden spoon until it's a thick, sticky dough.
5.Roll: Turn the mixture out onto plastic wrap and mold it into a log shape (about 5cm wide).
6.Coat: Roll the log in desiccated coconut until fully covered.
7.Chill: Wrap tightly and refrigerate for at least 4 hours (or overnight) to set.
8.Serve: Slice into 1cm thick rounds.
🚫 Tips & Mistakes to Avoid
• Wait to Set: If you slice it too early, it will crumble. It needs that fridge time to become "fudgy."
• Firm Candy: Don't use the super soft, airy marshmallows. You want the ones that are a bit "chewy" so they hold their shape.
• Melted Butter: Make sure the butter isn't boiling hot when you add the condensed milk, or the mixture might become oily.
❓ FAQ
Q1.Can I use Graham crackers?
Yes! They work as a perfect substitute for NZ malt biscuits.
Q2.Is it vegan?
Not usually, but you can use vegan butter, condensed coconut milk, and vegan marshmallows to make a great version!
📝 Summary
Lolly Cake is nostalgia in a slice. It’s colorful, chewy, and represents the playful side of New Zealand baking. It’s the perfect recipe to make with kids!
🧁 Final Thoughts
There you have it—three legendary New Zealand desserts that are guaranteed to win hearts! Whether it’s the elegant Pavlova, the golden magic of Hokey Pokey, or the fun Lolly Cake, these recipes prove that Kiwi food is all about joy and sharing.
The best thing about these treats is that they are honest and homemade. I challenge you to try the Hokey Pokey first—it’s so fast! Once you’ve done that, give the Lolly Cake a go for your next office snack.
| 🇳🇿 🍨 < Back |