
🏠 Home > 🗺️ Recipes > 🍞 Breads > 🇵🇦 Panama Breads > 🍞 1.Pan de Coco (Coconut Bread) , 2.Pan Flauta (Flute Bread) , 3.Pan de Elote (Sweet Corn Bread)
🍞 Mastering Panamanian Baking: Recipes for Pan de Coco, Flauta, and Elote
Published by Supakorn | Updated: February 2026
🍞 Welcome to the World of Panama Breads: A Culinary Hug
Hey there, fellow food lover! If you’ve ever found yourself scrolling through images of mouth-watering international cuisine, you've probably stumbled upon the rich, diverse, and surprisingly comforting world of Panamanian baking. Panama—a country famous for its iconic canal—is also a hidden gem for foodies, especially when it comes to bread. Forget your standard sourdough for a moment; we're diving into recipes that are steeped in tradition, bursting with flavor, and perfect for sharing.
Panamanian breads, often found in local panaderías (bakeries) or at family gatherings, are more than just a staple; they’re a central part of the culture. They range from slightly sweet, soft dinner rolls to hearty, savory loaves. While some recipes have been influenced by Spanish colonial history, others are distinctly Panamanian, using local ingredients and techniques passed down through generations. These breads are incredibly popular locally, and their fame is slowly but surely spreading across the globe as people discover the joy of baking these unique treats.
But here’s the best part: you don't need a plane ticket to enjoy them. This comprehensive guide brings the best of Panama’s baking tradition right into your kitchen. We’re going to walk through three of the most popular and beloved Panamanian bread recipes that cover the spectrum from sweet tropical rolls to crusty savory loaves and moist corn bread. Whether you’re a beginner baker or a seasoned pro, these long-form, detailed recipes are designed to give you all the tips and tricks you need to succeed. We’ll be covering:
🏆 1.Pan de Coco (Coconut Bread): A sweet, aromatic, and incredibly soft bread, perfect for breakfast or dessert.
🏆 2.Pan Flauta (Flute Bread): The quintessential long, crusty Panamanian sandwich bread, great for dipping.
🏆 3.Pan de Elote (Sweet Corn Bread): A moist, dense, and naturally sweet cake-like bread, celebrating Panama's love for corn.
Ready to roll up your sleeves and fill your kitchen with the irresistible aroma of fresh-baked goodness? Let's get baking!
🥥 Recipe 1: Pan de Coco (Coconut Bread) – The Sweet, Tropical Delight
🌴 About this Recipe: Panama's Favorite Sweet Treat
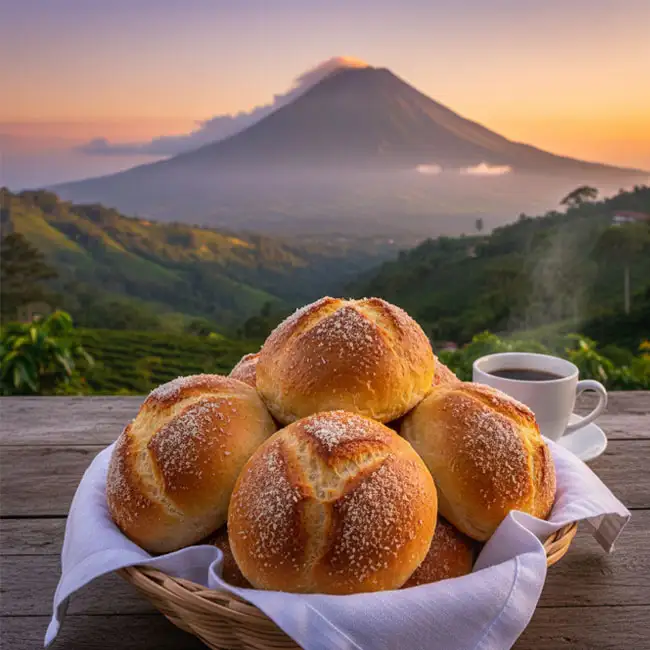
Pan de Coco, or Coconut Bread, is arguably the most famous sweet bread from Panama. It's a truly irresistible treat. This isn't just bread with coconut sprinkled on top; the coconut milk and sometimes grated coconut are integrated right into the dough, making the final product incredibly moist, tender, and fragrant. The sweetness is moderate, making it a versatile treat—it’s amazing on its own, toasted with butter, or dipped into a morning coffee or hot chocolate. It’s the ultimate comfort food that instantly transports you to a tropical, sunny beach. If you only bake one thing from Panama, make it this!
🥣 Ingredients & Measurements
Getting the ratio right is key to that signature soft texture. Here is everything you'll need, along with the correct measurements:
• Flour: 4 cups of all-purpose flour. Make sure it's sifted to avoid lumps and achieve a lighter texture in the final rolls.
• Yeast: 2 ¼ teaspoons (one standard packet) of active dry yeast. This will give your bread a beautiful, pillowy rise.
• Sugar: ½ cup of granulated white sugar. This feeds the yeast and adds the perfect touch of sweetness to the dough.
• Salt: 1 teaspoon of fine sea salt. Essential for balancing the sweetness and enhancing the overall flavor of the bread.
• Coconut Milk: 1 ½ cups of full-fat coconut milk (not the light kind!). This liquid base is crucial for moisture. Warm it gently to about 105°F–115°F (40°C-46°C) to properly activate the yeast.
• Butter: ½ cup (1 stick) of unsalted butter, melted and cooled slightly. The butter adds richness and tenderness to the crumb.
• Egg: 1 large egg, lightly beaten. It acts as a binder, adds flavor, and helps achieve a golden-brown crust.
• Optional Coconut Filling: ½ cup of finely grated, sweetened shredded coconut. You can knead this in for an extra boost of tropical flavor.
👩🍳 Step-by-Step Instructions
Follow these simple steps for a perfect batch of Pan de Coco:
1.Activate the Yeast: In a large mixing bowl or the bowl of a stand mixer, combine the warm coconut milk and 1 tablespoon of the sugar. Sprinkle the yeast over the top. Let it sit for 5–10 minutes until it looks foamy and bubbly—this confirms your yeast is active!
2.Mix Wet Ingredients: Add the melted butter, the beaten egg, and the remaining sugar to the yeast mixture. Whisk everything until it’s well combined and slightly uniform.
3.Combine Dry Ingredients: In a separate bowl, whisk together the flour and salt thoroughly.
4.Form the Dough: Gradually add the dry ingredients to the wet mixture, mixing on low speed (if using a stand mixer) or by hand with a wooden spoon. Once a shaggy dough forms, transfer it to a floured surface and knead it vigorously for about 8–10 minutes until it is perfectly smooth and elastic. If using the optional grated coconut, knead it in during the last 2 minutes until evenly distributed.
5.First Proof: Place the dough in a lightly oiled bowl, turning to coat all sides. Cover the bowl tightly with plastic wrap or a clean, damp kitchen towel. Let it rise in a warm, draft-free place for 1–1.5 hours, or until it has noticeably doubled in size.
6.Shape and Second Proof: Gently punch down the dough to release the trapped air. Divide it into 12 equal pieces and shape each piece into a smooth ball by pulling the edges underneath. Place the balls on a baking sheet lined with parchment paper, leaving a little space between them for expansion. Cover and let them rise again for another 30–45 minutes (this is the second proof).
7.Bake: Preheat your oven to 350∘F or 175∘C. Bake the rolls for 20–25 minutes, or until the tops are beautifully golden brown and they sound hollow when gently tapped on the bottom.
8.Cool: Transfer the hot rolls immediately to a wire rack to cool completely. For a lovely, soft finish, you can brush them with a little extra melted butter while they are still warm.
⚠️ Tips & Mistakes to Avoid
• Mistake: Using cold coconut milk. Tip: If the milk is too cold, the yeast will not wake up and activate. If it is too hot (above130°F ( 55°C), it will kill the yeast. Use a thermometer to keep it in the sweet spot (105∘F-115∘F) for best results.
• Mistake: Stopping the kneading process too early. Tip: This soft bread needs a good, thorough knead to develop the gluten. This is what prevents it from becoming crumbly and gives it that characteristic soft, airy, and slightly chewy texture.
• Tip for Extra Flavor: If you want a deeper color and flavor, you can substitute a portion of the white sugar with light brown sugar.
• Storage: Store any leftovers in an airtight container at room temperature for up to 3 days, or freeze the rolls once cooled for longer storage.
❓ FAQ
Q: Can I use instant yeast instead of active dry yeast?
A: Yes, you can! The beautiful thing about instant yeast is that you don't need to proof it separately. Just mix it directly with your flour and other dry ingredients, and then add the warm coconut milk and wet ingredients.
Q: My dough isn't rising properly. What could be the issue?
A: The most common causes are either inactive/expired yeast (always check the date!) or the environment is too cold for the dough to rise effectively. Try placing the bowl in a slightly warm, but turned-off, oven.
Q: Is there a way to make this loaf-style instead of rolls?
A: Absolutely! After the first proof, shape the entire dough mass into a single loaf and place it in a standard greased loaf pan. The baking time will be longer, likely 35–45 minutes, so keep an eye on it.
📝 Summary
Pan de Coco is a straightforward, yeast-based bread that’s perfect for beginner bakers looking for a rewarding, tropical treat. Its soft crumb and subtle sweetness make it an instant hit with anyone who tries it. It’s an essential Panamanian bake and a lovely introduction to the country’s pastry heritage.

🥖 Recipe 2: Pan Flauta (Flute Bread) – The Perfect Crusty Dipping Bread
🏞️ About this Recipe: The Long, Lean Panamanian Loaf
Pan Flauta, which translates literally to "Flute Bread," is Panama's version of a classic European-style baguette or long loaf, but with a unique Panamanian spin. It's characterized by its beautiful, thin, golden-brown crust and a light, chewy, and airy interior. Unlike the sweet Pan de Coco, this bread is a savory staple. It's often used to make hearty sandwiches, known locally as emparedados, or served alongside stews, soups (sancocho!), or savory dips. Its long, slender shape makes it ideal for ripping and sharing at the dinner table. If you love a good crunch and chew, this is the bread for you.
🥣 Ingredients & Measurements
Achieving that signature crust requires simple ingredients and precise hydration—pay attention to the flour type!
• Flour: 3 cups of high-quality bread flour. Bread flour is recommended because it has a higher protein content, which is key to developing the gluten necessary for that desirable chewy interior texture.
• Water: 1 ¼ cups of lukewarm water (about 105∘F or 40∘C). Ensure the water is lukewarm—not too hot, not too cold—for optimal yeast activity.
• Yeast: 1 teaspoon of active dry yeast. We use less yeast here than in a quick bread to encourage a slower fermentation, which deepens the savory flavor.
• Salt: 1 ½ teaspoons of fine sea salt. Essential for controlling yeast activity, building dough structure, and providing savory flavor.
• Olive Oil (Optional): 1 tablespoon of good-quality olive oil. While traditional recipes are often lean, a touch of oil can make the dough easier to handle and slightly improve the crumb's softness.
👩🍳 Step-by-Step Instructions
This recipe focuses on developing flavor and a great crust through slow fermentation:
1.Sponge/Starter (Poolish): In a small bowl, mix the yeast with the lukewarm water. Add about ½ cup of the flour and mix until smooth. Cover it loosely and let it sit at room temperature for 30 minutes. This creates a poolish or sponge, which significantly deepens the flavor profile of the bread.
2.Mix Dough: In a large bowl, combine the rest of the flour and the salt. Pour in the yeast sponge (poolish) and mix until a shaggy mass forms. If using, add the olive oil now.
3.Knead: Turn the dough out onto a lightly floured surface. Knead the dough for 8–10 minutes. The dough should become smooth, elastic, and pass the "windowpane test" (stretching a small piece thin enough to see light through it without tearing).
4.First Proof (Bulk Fermentation): Place the dough in a lightly oiled bowl, cover it securely, and let it rise for 1.5–2 hours. The goal is for the dough to nearly double in size.
5.Shaping the Flutes: Gently punch down the dough to deflate it and divide it into two equal portions. Work with one piece at a time: roll it out into a rectangle. Tightly roll the rectangle up, starting from a long edge and moving across, pinching the seam closed firmly. Gently roll the loaf a bit more to lengthen it to about 12–15 inches (30–38 cm). Repeat with the second piece.
6.Second Proof: Place the shaped loaves on a baking sheet lined with parchment paper. Cover loosely and let them rise again for another 45–60 minutes. They should look noticeably puffy.
7.Scoring and Steaming: Preheat your oven to a very hot 450°F / 230°C. Just before baking, use a sharp knife or razor to make 3–4 shallow diagonal cuts (scores) on the top of each loaf. For a professional, shiny crust, place a shallow metal pan on the bottom rack of your oven and pour a cup of hot water into it just as you place the bread inside. The steam is essential!
8.Bake: Bake for 20–25 minutes, or until the crust is a deep golden brown and firm to the touch.
⚠️ Tips & Mistakes to Avoid
• Mistake: Forgetting the steam! Tip: Steam is your secret weapon for that perfect, thin, crispy crust. Without it, the crust will set too quickly and become thick and overly chewy. If you can’t use the water pan method, spritz the inside walls of the oven with water 2–3 times during the first 10 minutes of baking.
• Mistake: Using all-purpose flour. Tip: While it will work, using bread flour is highly recommended. The higher protein content is key to getting the right chewiness (crumb structure) that defines a great flute bread.
• Tip for Extra Texture: For the absolute best crust, bake the bread directly on a preheated pizza or baking stone (or a heavy inverted baking sheet) that has been heating in the oven.
❓ FAQ
Q: Why do I need to score the bread before baking?
A: Scoring allows the bread to expand predictably and evenly in the hot oven (this is known as "oven spring"). If you omit this step, the crust will likely tear at the weakest point, leading to an irregular shape.
Q: Can I use this savory dough to make small dinner rolls?
A: Yes, absolutely! Divide the dough into smaller pieces after the first proof and shape them into rolls. Reduce the baking time to about 15–20 minutes.
Q: How do I store Pan Flauta to keep it fresh?
A: The crust is always best fresh on the day it's baked. Store at room temperature in a paper bag (not plastic!) for up to 2 days to help maintain the crust's texture.
📝 Summary
Pan Flauta is a masterclass in simplicity and technique. It’s a wonderful, versatile savory bread that proves you don't need fancy ingredients to achieve bakery-quality results. It’s the perfect companion for any meal where you need a sturdy, satisfying piece of bread for scooping up sauces or building a grand sandwich.

🌽 Recipe 3: Pan de Elote (Sweet Corn Bread) – The Moist and Sweet Corn Bread
🌾 About this Recipe: A Taste of the Panamanian Countryside
While Pan Flauta and Pan de Coco are classic bakery staples, Pan de Elote (Sweet Corn Bread) offers a different, more rustic type of comfort. This is a dense, incredibly moist, and naturally sweet quick bread that celebrates one of Central America's most important ingredients: corn (elote). Unlike some dry cornbreads you might find elsewhere, the Panamanian version is incredibly rich and often has a texture that leans toward a sweet cake or custard rather than a traditional bread. It’s usually served as a sweet snack or a dessert. The use of fresh or canned corn makes it distinctively flavorful and aromatic, bringing a unique texture that’s simply irresistible.
🥣 Ingredients & Measurements
Achieving the perfect moisture and sweetness requires the right balance of corn and dairy:
• Corn: 2 cups of fresh or canned corn kernels, drained well. If using canned corn, make sure to rinse and drain it lightly.
• Cornmeal: 1 cup of fine yellow cornmeal. This is crucial for structure and that authentic corn flavor.
• Flour: 1 cup of all-purpose flour. This balances the cornmeal and keeps the texture from being too crumbly.
• Sugar: ¾ cup of granulated white sugar. This is a sweet bread, and this amount is needed to achieve the expected dessert-like sweetness.
• Baking Powder (Leavening): 1 tablespoon of baking powder. Since this is a quick bread (no yeast), this is the main lifting agent.
• Salt: ½ teaspoon of fine sea salt. This enhances the sweetness and rounds out the flavor.
• Butter: ½ cup (1 stick) of unsalted butter, melted and cooled slightly. The butter is key for richness and moisture.
• Milk: ½ cup of whole milk (or evaporated milk for extra richness).
• Eggs: 2 large eggs, lightly beaten. They provide binding and richness to the batter.
• Optional Creaminess: ½ cup of sour cream or plain yogurt. This ingredient is the secret to keeping the finished bread incredibly moist and tender.
👩🍳 Step-by-Step Instructions
This is a quick bread recipe, meaning no kneading or long proofing times—you can have this in the oven fast!
1.Prepare the Corn Puree: In a blender or food processor, combine 1 cup of the corn kernels with the milk, eggs, and melted butter. Blend until the mixture is mostly smooth. It’s okay—and often desirable—to leave a little texture and a few small corn chunks.
2.Combine Dry Ingredients: In a large bowl, whisk together the flour, cornmeal, sugar, baking powder, and salt. Make sure they are thoroughly mixed.
3.Mix Wet and Dry: Pour the corn puree mixture into the dry ingredients. Stir gently using a spatula or wooden spoon just until they are combined. Crucially, do not overmix! Overmixing will develop the flour's gluten and result in a tough, dry bread.
4.Add Remaining Corn: Gently fold in the remaining 1 cup of whole corn kernels and the optional sour cream or yogurt, if you are using it for extra moisture.
5.Bake Preparation: Preheat your oven to 375∘F or 190∘C. Thoroughly grease and flour an 8x8 inch square baking dish or a standard loaf pan.
6.Bake: Pour the batter evenly into the prepared pan. Bake for 35–45 minutes. The bread is done when a toothpick inserted into the center comes out clean or with just a few moist crumbs attached.
7.Cool: Let the Pan de Elote cool in the pan for about 10–15 minutes before slicing and serving. This allows the custardy, moist structure to fully set without falling apart.
⚠️ Tips & Mistakes to Avoid
• Mistake: Not scraping the sides of the blender/food processor. Tip: Ensure the corn, milk, and eggs are fully incorporated into the puree for a consistent texture.
• Mistake: Using fine cornmeal and overmixing. Tip: The combination of fine cornmeal and overmixing will produce a dense, rubbery texture. Mix minimally and use baking powder to provide the lift.
• Tip for Max Flavor: Try to use fresh corn off the cob during corn season. The natural sweetness and rich flavor are superior. If not, frozen corn is a good second choice over canned.
• Serving Suggestion: This bread is best served warm. Try a slice with a pat of softened butter, or enjoy it as a side to a savory chili for a sweet and savory contrast.
❓ FAQ
Q: Can I turn this recipe into muffins?
A: Yes! Fill greased muffin tins about two-thirds full. The baking time will be significantly shorter, around 20–25 minutes.
Q: Why does my Pan de Elote taste dry?
A: This is usually due to one of two things: overbaking (always check early!) or not adding enough moisture (the sour cream/yogurt is vital here).
Q: Is this considered a breakfast food or a dessert in Panama?
A: It truly spans both! Because of its sweetness, it functions beautifully as a dessert, but it is also commonly enjoyed with a morning coffee or as an afternoon snack.
📝 Summary
Pan de Elote is a wonderfully rich and satisfying quick bread. It's easy to pull together, requires no fancy techniques, and offers a delightful sweet corn flavor with a uniquely moist, almost pudding-like texture. It’s a comforting piece of Panama that your family and friends will absolutely love.
🎉 Final Thoughts: Your Panamanian Baking Adventure Begins Now
Wow, you made it! You now have three amazing, authentic Panamanian bread recipes ready to go. From the sweet and tender Pan de Coco to the crusty, versatile Pan Flauta, and the delightfully moist Pan de Elote, you’ve explored the rich diversity of Panama’s baking scene.
The biggest takeaway here is this: baking incredible, international bread doesn't have to be intimidating. These recipes, while rooted in tradition, are accessible to home bakers of all skill levels. They rely on simple ingredients and a little bit of patience.
So, what are you waiting for? I encourage you to pick one recipe—maybe start with the tropical Pan de Coco for a sweet treat, or dive straight into the rustic Pan Flauta—and give it a try this weekend. Take your time, enjoy the process, and don't worry about perfection; the joy is in the making (and the eating!).
Once you’ve successfully baked your first batch, be sure to share your experience! Tell us which one was your favorite and what you paired it with. Happy baking, and enjoy your delicious taste of Panama!
| 🇵🇦 🍞 < Back |