
🏠 Home > 🗺️ Recipes > 🍞 Breads > 🇸🇬 Singapore Breads > 🍞 1.The Classic Traditional Hainanese White Bread (The king of Kaya Toast) , 2.Sweet and Fragrant Pandan Swirl Buns (The emerald-green tea-time favorite) , 3.Roti Bangkali (The rustic, crusty "charcoal" style bread)
🍞 Master the Art of Fluffy Singaporean Breads on a Tiny Budget
Published by Supakorn | Updated: February 2026
🇸🇬 🧀🍪Introduction: The Nostalgic Aroma of the Neighborhood Bakery
Hey there! If you’ve ever walked past an old-school traditional bakery in Singapore at 6:00 AM, you know exactly what I’m talking about—that heavenly, buttery, slightly sweet scent that fills the entire street. In Singapore, bread isn't just a side dish; it’s a cultural icon. From the thick slabs of toast dipped in soft-boiled eggs to the colorful buns filled with sweet fillings, bread is the heartbeat of a local breakfast.
Lately, artisanal sourdough and fancy pastries have become super expensive, but I have a secret for you: the most beloved Singaporean breads are actually some of the cheapest things you can bake! We’re talking about basic ingredients like flour, water, and yeast that transform into something magical. In this guide, I’m going to show you how to bake three iconic Singaporean-style breads for less than 2 dollars a loaf. It’s fun, it’s therapeutic, and your house is going to smell incredible.
We’re going to master:
👑 • Recipe 1. The Classic Traditional Hainanese White Bread (The king of Kaya Toast)
🤴 • Recipe 2. Sweet and Fragrant Pandan Swirl Buns (The emerald-green tea-time favorite)
👸 • Recipe 3. Roti Bangkali (The rustic, crusty "charcoal" style bread)
Ready to get your hands floury? Let's get baking!
🍞 Recipe 1: Traditional Hainanese White Bread (Kaya Toast Style)
🍞 About this Recipe
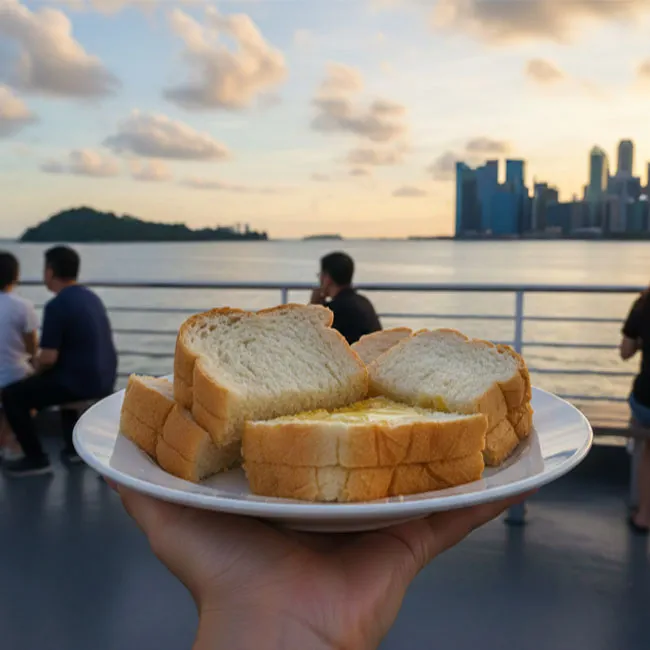
This is the bread that started it all. The Hainanese community in Singapore perfected this recipe decades ago. It’s a tall, airy, and slightly sweet loaf with a very thin crust. It is specifically designed to be sliced thick, toasted until crispy on the outside but soft on the inside, and slathered with cold butter and Kaya (coconut jam). Making this at home for under 2 dollars is a total game-changer for your breakfast routine.
🍞 Ingredients & Measurements
The Flour Power:
• High-protein Bread Flour: 300 grams
• All-purpose Flour: 50 grams
The Yeast & Sweetness:
• Instant Dry Yeast: 6 grams
• Fine Caster Sugar: 30 grams
The Liquids & Fats:
• Lukewarm Water: 210 milliliters
• Room Temperature Butter (unsalted): 30 grams
• Milk Powder (optional for extra creaminess): 15 grams
• Fine Salt: 5 grams
🍞 Step-by-Step Instructions
1.Mix the Dry Ingredients: In a large bowl, whisk together the bread flour, all-purpose flour, sugar, yeast, and milk powder. Keep the salt on the opposite side of the yeast initially (salt can kill yeast if they touch directly in high concentrations).
2.Form the Dough: Gradually pour in the lukewarm water. Stir with a wooden spoon until a shaggy dough forms.
3.The Kneading Process: If you’re doing this by hand, turn the dough onto a floured surface. Knead for about 5 minutes until it’s less sticky. Now, add the softened butter. It will get messy, but keep kneading! After about 12 to 15 minutes, the dough should be smooth, elastic, and pass the "windowpane test" (you can stretch a small piece until it's thin enough to see light through without it tearing).
4.First Rise: Shape the dough into a ball, place it in a lightly oiled bowl, and cover with a damp cloth. Let it rise in a warm spot for about 1 hour or until it doubles in size.
5.Shaping for the Loaf: Punch the air out of the dough. Divide it into three equal balls. Roll each ball into a rectangle and then roll it up like a Swiss roll. Place these three rolls side-by-side in a standard loaf tin.
6.Second Rise: Let the dough rise again in the tin for about 45 minutes. It should reach about 80% of the height of the tin.
7.Baking: Preheat your oven to 356 degrees Fahrenheit ( 180 degrees Celsius ). Bake the loaf for 25 to 30 minutes. If the top gets brown too fast, cover it loosely with foil.
8.Cooling: Once done, remove from the tin immediately and let it cool on a wire rack. Don't slice it while it's hot, or the inside will become gummy!
🍞 Tips & Mistakes to Avoid
• Check Your Yeast: If your yeast doesn't foam up or if your dough doesn't rise, your yeast might be dead. Always store yeast in the fridge!
• The Windowpane Test: Most people stop kneading too early. If the dough isn't elastic, your bread will be dense instead of fluffy.
• Don't Over-Flour: It’s tempting to keep adding flour when the dough is sticky, but too much flour makes the bread tough. Use a light touch!
• Oven Temperature: Every oven is different. Use an oven thermometer if you can to make sure you're actually at 356∘F or 180∘C.
🍞 FAQ
Q1.Can I use a bread machine?
Absolutely! Just follow your machine’s instructions for a "Basic White" or "Sweet" setting using these ingredients.
Q2.Why is my crust so thick?
You might have baked it for too long or at a temperature that was too low. High heat for a shorter time usually yields a thinner crust.
🍞 Summary
This Hainanese loaf is the perfect "blank canvas." It’s incredibly cheap to make—mostly just flour and water—but it tastes 100 times better than anything you’d buy at a supermarket.

🌿 Recipe 2: Sweet Pandan Swirl Buns
🌿 About this Recipe
These buns are a staple in Singaporean bakeries. They take the fluffy texture of Asian milk bread and infuse it with the incredible, tropical aroma of Pandan. We use a "tangzhong" (water roux) method here, which is an Asian bakery secret that keeps the bread soft for days. By swirling the green pandan dough with plain dough, you create a beautiful pattern that looks like it cost a fortune, but actually costs pennies!
🌿 Ingredients & Measurements
The Tangzhong (Starter):
• Bread Flour: 20 grams
• Water: 100 milliliters
The Main Dough:
• Bread Flour: 350 grams
• Sugar: 50 grams
• Instant Yeast: 7 grams
• Salt: 5 grams
• Large Egg: 1 unit
• Lukewarm Milk: 120 milliliters
• Softened Butter: 40 grams
The Flavoring:
• Pandan Extract: 1 teaspoon
• Green Food Coloring (optional): 1 drop
🌿 Step-by-Step Instructions
1.Make the Tangzhong: In a small saucepan, whisk 20g flour and 100ml water. Cook over medium heat, stirring constantly, until it becomes a thick paste (like pudding). Let it cool to room temperature.
2.Mix the Dough: In a large bowl, combine the flour, sugar, yeast, and salt. Add the milk, egg, and the cooled tangzhong.
3.Knead: Knead the dough until it comes together. Add the butter and continue kneading until smooth and elastic.
4.Divide and Color: Split the dough into two equal halves. Leave one half plain. To the other half, add the pandan extract and knead until the color is uniform.
5.First Rise: Place both dough balls in separate oiled bowls and let them rise for 1 hour.
6.Create the Swirl: Roll the plain dough into a large rectangle. Roll the pandan dough into a slightly smaller rectangle and place it on top of the plain one. Roll them up tightly together like a log.
7.Cut and Shape: Cut the log into 8 to 10 thick slices. Place them in a greased baking pan, swirl-side up.
8.Final Rise & Bake: Let them rise for 45 minutes. Brush the tops with a little milk or egg wash. Bake at 338∘F ( 170∘C ) for 20 to 25 minutes.
🌿 Tips & Mistakes to Avoid
• Cool the Tangzhong: Never add hot tangzhong to your dough; it will kill the yeast and scramble the egg.
• Tight Roll: When making the swirl, roll the dough as tightly as possible to avoid big air gaps in the middle of your buns.
• Pandan Strength: Different extracts have different strengths. Start with a little—you want it to smell like a garden, not a perfume factory!
• Milk Temperature: The milk should be warm to the touch (like baby bath water), not hot.
🌿 FAQ
Q1.Can I use coconut milk instead of dairy milk?
Yes! It actually enhances the pandan flavor beautifully and keeps the cost low.
Q2.Can I add fillings?
Definitely.Putting a little sweetened coconut flakes or red bean paste in the center before rolling is very popular.
🌿 Summary
These Pandan Swirl Buns are the ultimate tea-time treat. They are soft, fragrant, and the green swirls make them look like professional artisanal buns despite being very budget-friendly.

🥖 Recipe 3: Roti Bangkali (Rustic Local Bread)
🥖 About this Recipe
Roti Bangkali is the "tougher" brother of the Hainanese loaf. It’s a rustic, traditional bread that was historically baked in charcoal ovens. It has a slightly thicker, darker crust and a very chewy, satisfying crumb. It’s the kind of bread you see piled high in old coffee shops, usually served with a thick curry or a bowl of mutton soup. It requires very few ingredients, making it perhaps the cheapest bread on this list!
🏷️ Ingredients & Measurements
The Bread Base:
• Bread Flour: 400 grams
• Whole Wheat Flour (optional, for texture): 50 grams
• Instant Yeast: 5 grams
The Flavor & Texture:
• Warm Water: 280 milliliters
• Salt: 7 grams
• Vegetable Oil (instead of butter): 2 tablespoons
• Honey or Brown Sugar: 1 tablespoon
🥖 Step-by-Step Instructions
1.Activate Yeast: Mix the warm water with honey/sugar and yeast. Let it sit for 5 minutes until it’s bubbly.
2.Combine: In a large bowl, mix the flour and salt. Pour in the yeast mixture and the vegetable oil.
3.The "Rough" Knead: This bread doesn't need to be as silky as the chiffon-style breads. Knead it for about 8 to 10 minutes until it’s firm and holds its shape well.
4.Bulk Fermentation: Let the dough rise for 1.5 hours. Because this dough has less sugar and fat, it might take a little longer to rise.
5.The Rustic Shape: Shape the dough into one large, rustic oval or a long baton. Place it on a baking tray lined with parchment paper.
6.The Scoring: Use a very sharp knife to make 3 or 4 deep diagonal slashes across the top. This allows the bread to expand and gives it that iconic "local" look.
7.Steam Bake: Preheat your oven to 428 degrees Fahrenheit or 220 degrees Celsius. Place a small tray of water at the bottom of the oven—the steam will help create that signature chewy crust.
8.Bake: Bake for 25 to 30 minutes until the crust is a deep, dark golden brown and the bottom sounds hollow when tapped.
🥖 Tips & Mistakes to Avoid
• The Steam is Secret: Don't skip the water tray! Without steam, the crust will be hard and dry rather than chewy and crisp.
• Don't Over-Knead: You want some structure, but you don't want it to be as soft as a pillow. This bread is meant to be sturdy.
• High Heat: Make sure the oven is really hot before the bread goes in to get that "oven spring" (the final burst of rising).
• Cooling Time: Let this bread cool for at least an hour. The crust continues to develop its texture as it cools.
🥖 FAQ
Q1.Why is my bread so heavy?
You might not have let it rise long enough. In cooler climates, the first rise might take up to 2 hours.
Q2.What do I eat this with?
This is the best bread for dipping into any kind of gravy, beef stew, or even just dipping into a cup of hot Kopi (local coffee).
🥖 Summary
Roti Bangkali is for the bread purists. It’s hearty, filling, and costs almost nothing to make. It’s the perfect bread to have on the table for a big family dinner.
🏁 Final Thoughts: Your Kitchen, Your Bakery
There you have it! Three legendary Singaporean breads that you can whip up in your own kitchen for less than 2 dollars a loaf. Isn't it amazing how a little bit of flour, water, and patience can create something that tastes so much like home?
Baking bread can seem intimidating at first, but remember that even a "failed" loaf usually still tastes great when toasted with some butter! I encourage you to try the Hainanese White Bread first because it’s so rewarding to see that tall, fluffy loaf come out of the oven. Once you’re comfortable, move on to the Pandan Swirl Buns to impress your friends, and finally the Roti Bangkali for your next big dinner.
The best part about baking your own bread is that you control exactly what goes into it—no preservatives, no weird chemicals, just pure, delicious goodness. Plus, the money you save can go toward buying some high-quality Kaya or butter to go on top!
| 🇸🇬 🍞 < Back |