
🏠 Home > 🗺️ Recipes > 👑🍞 Artisan Royal Breads (Breads) > 🇳🇿 New Zealand Artisan Royal Breads (Breads) Recipes > 👑🍞 1.Golden Aotearoa Heritage Hearth Bread
👑🍞 500-Year Culinary Secrets Behind New Zealand’s Forgotten Heritage Breads
Published by Supakorn | Updated: September 2026
⚔️🏰 The Forgotten Aristocratic Legacy of New Zealand: From Māori Foodways to Early Colonial Kitchens
📜 The Storyteller’s Intro
Imagine stepping into a quiet kitchen somewhere in Aotearoa New Zealand centuries ago.
There is no electric oven humming in the corner. No supermarket flour sits neatly inside a paper bag. There is no measuring scale, recipe app, or perfectly printed cookbook waiting beside the workbench.
Instead, food depends on the land, the season, fire, patience, and knowledge passed from one generation to another.
But there is an important detail that makes the story of New Zealand bread different from many European bread traditions.
Five hundred years ago, bread made from wheat was not part of everyday Māori cuisine.
The traditional food culture of Aotearoa was built around native plants, cultivated kūmara, seafood, birds, roots, fruits, and other ingredients gathered or grown according to local knowledge. Wheat and European-style bread entered New Zealand much later, following sustained European contact and settlement.
That distinction actually makes the story more fascinating.
Rather than pretending that a European-style loaf existed in New Zealand 500 years ago, we can look at the much deeper culinary journey behind it: the meeting of Māori food knowledge, imported grains, early settlement, domestic baking, and eventually the refined kitchens of prosperous households.
This is where our idea of forgotten New Zealand heritage bread begins.
It is not simply a recipe.
It is a story about how an ingredient as ordinary as flour became part of a completely different food culture.
🌍 The Global Value
Throughout history, bread has often represented more than food.
In wealthy households, good flour, fresh butter, cream, preserved fruit, and carefully baked loaves could signal abundance. In working kitchens, bread represented practicality, nourishment, and the ability to turn a small collection of ingredients into something satisfying.
New Zealand developed its own culinary identity through several overlapping traditions.
Māori foodways provided an ancient foundation based on local resources and sophisticated knowledge of seasonality and preparation. Later European settlers introduced wheat, ovens, milling practices, and baking traditions that gradually became part of everyday life.
As settlement expanded, bread became increasingly familiar.
For prosperous households, baking could become more elaborate. Fine flour, rich dairy ingredients, dried fruits, spices, and careful shaping transformed a basic loaf into something suitable for an impressive breakfast, afternoon table, or formal gathering.
That is where the aristocratic touch comes into our story.
New Zealand did not develop a centuries-old royal bread tradition comparable to European monarchies. However, affluent households, landowners, governors, merchants, and socially prominent families could maintain kitchens where imported culinary ideas were adapted to local ingredients.
Those adaptations are worth remembering.
🕯️ The Collection
This article brings that forgotten atmosphere back to the modern kitchen with a heritage-style New Zealand bread inspired by the country's historical baking journey.
The goal is not to claim that one surviving loaf came directly from a 500-year-old palace kitchen.
Instead, we are recreating the feeling of historical baking: simple ingredients, excellent flour, rich dairy, careful fermentation, and patient oven work.
Think of it as a culinary bridge between old-world baking techniques and New Zealand's developing food identity.
The result is a rustic but elegant loaf with a golden crust, soft interior, gentle sweetness, and a rich aroma that feels perfectly suited to a heritage table.
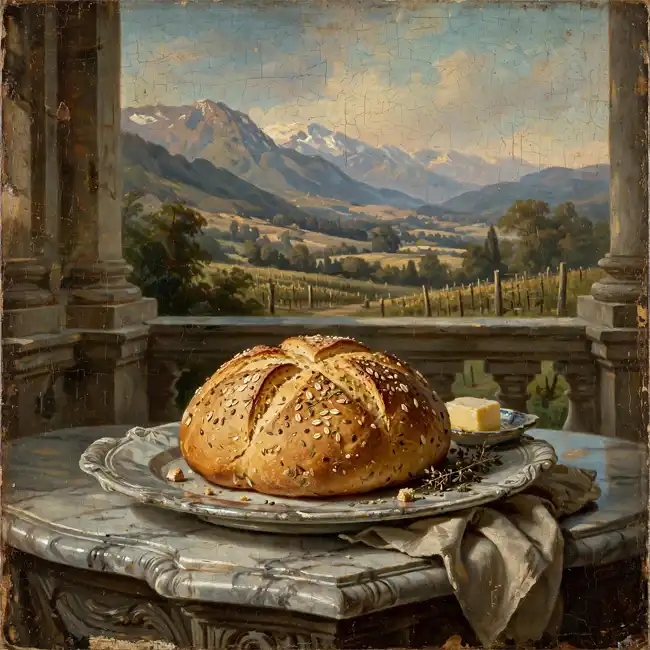
🍞 Recipe: Golden Aotearoa Heritage Hearth Bread
🏺 About This Aristocratic Secret
Picture a grand country household during the early development of New Zealand's European-influenced food culture.
The kitchen is warm from the oven. Fresh bread is cooling on a wooden board. A large table is being prepared for guests, while the baker checks the crust and listens for that familiar hollow sound beneath the loaf.
This bread is inspired by that atmosphere.
Rather than presenting it as an authenticated 500-year-old Māori recipe—which would be historically inaccurate—we treat it as a heritage-inspired New Zealand hearth bread.
Its character comes from the contrast between humble bread-making and refined presentation.
The ingredients are straightforward, but the technique makes the difference.
A generous amount of dairy gives the crumb softness. A small quantity of natural sweetness rounds out the wheat. Slow fermentation creates deeper flavor, while careful shaping produces the kind of loaf that looks impressive even without complicated decoration.
It is exactly the sort of bread that reminds us why historical cooking does not always need extravagant ingredients.
Sometimes, the secret is simply knowing how to treat ordinary ingredients exceptionally well.
🧺 Ingredients & The Aristocratic Touch
🌾 The Royal Pantry
For our New Zealand-inspired heritage version, imagine the pantry of a prosperous household rather than a literal royal palace.
The flour is the foundation.
Historically inspired baking works best when the flour has enough protein to create a strong but tender structure. A good bread flour produces a loaf that rises confidently while remaining soft inside.
Butter adds richness.
In a wealthy household, fresh dairy would have been an appreciated ingredient, especially when compared with simpler everyday preparations. Here it gives the bread a delicate aroma and smoother texture.
Milk softens the crumb and adds a subtle creaminess.
A little honey provides gentle sweetness without turning the loaf into a dessert.
Salt is essential. It balances the flavor and helps strengthen the dough.
Yeast provides the lift that turns a dense mixture into a light, fragrant loaf.
🔄 Modern Substitutes
You do not need historically perfect ingredients to make this bread at home.
• Bread flour: Use strong all-purpose flour if bread flour is unavailable. The loaf may be slightly softer and less chewy.
• Whole milk: Oat milk can be used for a dairy-free variation, although the flavor will be lighter.
• Butter: Unsalted butter gives the cleanest flavor. Plant-based butter can work if necessary.
• Honey: Maple syrup can replace it, although honey gives a more rounded aroma.
• Instant yeast: Active dry yeast can be substituted. Allow a little extra time for activation.
• Fine sea salt: Regular table salt works, but reduce the quantity slightly if it is particularly fine.
• Warm water: Use comfortably warm water rather than very hot water. Excessive heat can damage the yeast.
⚖️ The Measurements
The following ratio is designed for one generous heritage-style loaf.
• Bread flour — 500 grams
• Warm whole milk — 180 milliliters
• Warm water — 100 milliliters
• Unsalted butter — 40 grams
• Honey — 25 grams
• Fine sea salt — 9 grams
• Instant yeast — 7 grams
• Additional flour — approximately 20–30 grams for shaping, only if necessary
The key ratio is approximately 500 parts flour to 280 parts liquid, with the butter and honey providing richness.
Do not automatically add all the extra flour.
A slightly soft dough is preferable to a dry one.
That little difference can determine whether your finished bread feels tender and luxurious or heavy and ordinary.
👨🍳 The Chef’s Ritual
🔥 Step 1: Awaken the Dough
Combine the warm milk, warm water, honey, and yeast.
If using instant yeast, you can proceed almost immediately. If using active dry yeast, allow the mixture to sit for several minutes until lightly foamy.
The liquid should feel warm, not hot.
This is one of those tiny details that historical bakers learned through experience rather than digital thermometers.
🌾 Step 2: Build the Foundation
Place the flour and salt in a large mixing bowl.
Pour in the liquid mixture gradually.
Stir until a rough dough begins to form.
At this point, resist the temptation to add lots of flour.
The dough should feel soft and slightly tacky.
That moisture will help create the tender crumb we want.
🧈 Step 3: Add the Aristocratic Touch
Work the softened butter into the dough.
At first it may seem messy.
Keep going.
The dough will gradually become smoother as the butter disappears into the flour.
This is where the humble loaf starts to feel luxurious.
Knead for approximately 8–10 minutes by hand, or use a mixer with a dough hook for about 6–8 minutes.
The finished dough should become elastic and smooth.
⏳ Step 4: Give It Time
Place the dough into a lightly greased bowl.
Cover it and leave it somewhere comfortably warm.
Allow approximately 60–90 minutes for the first rise, depending on room temperature.
Do not judge the dough solely by the clock.
Look at it.
When it has expanded noticeably and feels airy, it is ready.
Historical-style cooking rewards patience.
🤲 Step 5: Shape the Loaf
Gently press the dough to release excess air.
Shape it into a round or oval loaf.
For a more refined presentation, tuck the edges underneath so the surface becomes smooth.
Place it onto baking paper or a lightly prepared baking tray.
Cover again and allow another 30–45 minutes for the second rise.
🗡️ Step 6: Create the Signature
Before baking, make two or three shallow cuts across the top.
These cuts are practical as well as decorative.
They give expanding steam a controlled path to escape while creating the beautiful rustic appearance associated with traditional hearth loaves.
For an elegant table presentation, keep the cuts simple.
You want the bread to look handcrafted rather than overly decorated.
🔥 Step 7: Bake Like a Heritage Baker
Preheat the oven to approximately 428 degrees Fahrenheit / 220 degrees Celsius.
Place the loaf inside and bake for about 10 minutes.
Then reduce the temperature to approximately 375 degrees Fahrenheit ( 190 degrees Celsius ) and continue baking for another 20–25 minutes.
The crust should become deep golden brown.
When the loaf sounds hollow when tapped underneath, it is usually ready.
Transfer it to a cooling rack.
And now comes the hardest part.
Wait.
Allow at least 30 minutes before slicing.
The interior continues to settle as it cools.
Cutting too early can release steam and make the crumb appear heavier than it actually is.
🗝️ Secrets of the Palace Kitchen (Tips & Mistakes)
🥖 Secret 1: Never Chase a Dry Dough
One of the most common mistakes is adding too much flour.
A baker sees sticky dough and immediately reaches for another handful.
That usually produces a dense loaf.
Instead, knead patiently for several minutes before deciding whether additional flour is truly necessary.
🌡️ Secret 2: Temperature Controls Everything
Yeast is extremely sensitive to temperature.
Water that is too cold slows fermentation.
Water that is excessively hot can damage the yeast.
Aim for comfortably warm liquid.
Your hands are surprisingly useful here.
🧂 Secret 3: Respect the Salt
Salt does much more than make bread taste salty.
It helps balance flavor and influences dough strength.
Do not eliminate it simply because the bread contains butter and honey.
The small amount used here gives the loaf a much more complete flavor.
⏳ Secret 4: Let Fermentation Do the Work
If your kitchen is cool, the dough may require more time.
Do not force it by placing it directly beside a very hot oven.
Slow, steady fermentation generally produces better flavor and texture.
🧈 Secret 5: Butter Belongs in the Dough at the Right Moment
Adding butter after the initial dough has begun forming allows gluten development to start before the fat fully coats the flour.
That can help create a better balance between structure and tenderness.
🔥 Secret 6: A Dark Crust Is Not Automatically a Burnt Crust
A beautifully baked heritage loaf should have substantial color.
A pale loaf can taste underdeveloped even when the interior is cooked.
Look for a rich golden-brown surface rather than an extremely pale crust.
❌ Common Mistake: Cutting Too Soon
This is probably the most difficult rule to follow.
Fresh bread smells incredible.
You will want to cut it immediately.
Don't.
Give the loaf time to cool.
The crumb needs that period to finish setting.
❌ Common Mistake: Using Excessive Sweetener
This is bread, not cake.
Honey should provide a subtle background note.
Adding too much will make the loaf overly sweet and can interfere with the balanced flavor we are trying to recreate.
🕌❓ Royal FAQ
Q1.Is this really a 500-year-old New Zealand bread recipe?
No. The “500-year-old” phrase in the editorial title refers to the deep historical framing of New Zealand's culinary heritage, not a claim that this exact wheat-bread recipe existed in Aotearoa 500 years ago. Wheat-based European-style bread arrived much later.
Q2.What kind of bread did Māori traditionally eat?
Traditional Māori foodways were not centered on wheat bread. Māori cuisine relied on locally available foods such as kūmara, seafood, birds, roots, and native plants, prepared using techniques developed for the environment of Aotearoa.
Q3.Why call this an aristocratic bread?
“Aristocratic” describes the refined historical presentation and prosperous-household inspiration of the recipe. It does not mean this exact loaf can be documented as having been served by a specific New Zealand royal family.
Q4.Can I make this bread without dairy?
Yes. Replace the milk with an unsweetened plant-based alternative and use a suitable dairy-free butter. The finished bread will be slightly different but can still have a soft, rich crumb.
🕰️ The Taste of History
Take a slice while the bread is still slightly warm.
The first thing you notice is the crust.
It should offer a gentle resistance before giving way to a soft, fragrant interior.
The butter adds richness without overwhelming the wheat.
The honey remains subtle, appearing more as a rounded aroma than an obvious sweetness.
And underneath everything is the character of properly fermented bread.
That is what makes this recipe interesting.
It does not need exotic ingredients.
It does not need complicated decoration.
Its appeal comes from technique.
The same principle appears again and again in historical cooking.
Good food often begins with understanding what the ingredients can do rather than trying to force them into something they are not.
And in the New Zealand context, the deeper story is even more valuable.
The country's food history is not one single straight line.
It is a meeting of Māori knowledge, local resources, migration, imported crops, changing technology, domestic kitchens, and evolving ideas about hospitality.
This loaf represents one small chapter in that much larger story.
🌿 Final Thoughts: Bringing History to Your Table
There is something wonderful about making bread by hand.
You begin with flour, water, yeast, salt, butter, and a little sweetness.
Then you wait.
You knead.
You shape.
You bake.
And somehow, those ordinary ingredients become something that feels much more meaningful.
That is the beauty of heritage cooking.
Even when we cannot honestly place one exact loaf inside a kitchen five centuries ago, we can still use food to explore the history of a place.
For New Zealand, that means respecting the difference between ancient Māori food traditions and later European-influenced baking.
It also means recognizing that culinary history changes when cultures meet.
So make this bread slowly.
Let the dough rise naturally.
Give the crust enough time to develop.
Then place the finished loaf in the center of the table and imagine the generations of cooks who transformed simple ingredients into something worth sharing.
You do not need a palace to create a memorable loaf.
You only need good ingredients, patience, and a little respect for the story behind the food.
⚱️ The Call to Action: The Golden Hook
If you love forgotten flavors and culinary stories, keep exploring the foods that connect us with earlier generations.
Every heritage recipe carries something beyond taste.
It may preserve an ingredient, a technique, a memory, a landscape, or a way of welcoming people around a table.
And when we recreate these foods thoughtfully, we are not simply cooking old recipes.
We are helping keep culinary stories alive.
So bake the loaf.
Share it with your family or friends.
Talk about where the ingredients came from.
And most importantly, remember that the best historical cooking does not need to invent a legend.
Sometimes the real history is already fascinating enough.
🏺 Credit to the Keepers of the Culture: The Legacy
New Zealand's culinary heritage deserves to be approached with respect and care.
The oldest foundations of Aotearoa's food culture belong to Māori communities and the generations who developed detailed knowledge of local plants, animals, seasons, preparation methods, and the land itself.
Those traditions should not be casually relabeled as European recipes or folded into a fictional “royal” history.
That is why this article deliberately uses Aristocratic rather than Royal when discussing later prosperous-household influences.
The heritage-style bread presented here is a modern interpretation inspired by the broader history of New Zealand baking. It should not be treated as an authenticated ancient Māori recipe or as a verified 500-year-old palace formula.
The distinction matters.
Food history becomes more meaningful when we preserve what is known, acknowledge what is uncertain, and give proper respect to the cultures that carried culinary knowledge across generations.
The greatest legacy is not simply reproducing an old flavor.
It is understanding the people, places, and traditions behind it.
And that is the real secret worth keeping.
| 🇳🇿 👑🍞 < Back |