
🏠 Home > 🗺️ Recipes > 🍞 Breads > 🇵🇬 Papua New Guinea Breads > 🍞 1.Classic PNG Coconut Bread (The fluffy, tropical staple) , 2.Skillet Banana Scone-Bread (The perfect sweet-savory hybrid) , 3.Cassava Garlic Flatbread (The ultimate grain-free savory side)
🍞 The Warmth of the Pacific: Authentic Homemade Breads from Papua New Guinea
Published by Supakorn | Updated: February 2026
Hey there! Is there anything in the world better than the smell of fresh bread wafting through the house? I don't think so. Today, we are going on a little journey to a place where bread isn't just a side dish—it’s a symbol of community and heart. We are exploring the "Signature Home Taste" of Papua New Guinea (PNG) Breads.
Now, when you think of bread, you might think of a standard sourdough or a baguette. But in PNG, the "bread" culture is beautifully influenced by the tropical environment. Instead of just wheat, we use what the land provides: creamy coconut, starchy cassava, and the sweetest bananas you've ever tasted. These breads are often dense, moist, and naturally flavorful. They are perfect for tearing apart with your hands and sharing around a table.
Lately, these tropical-style bakes have been getting a lot of attention in international "artisan" bakeries. People are falling in love with the gluten-free options and the rich, plant-based fats that make these breads so satisfying.
In this ultimate guide, I’m going to share three of the most popular, must-try recipes that will bring that island warmth straight into your kitchen. We are going to bake:
🌋 • Recipe 1; Classic PNG Coconut Bread (The fluffy, tropical staple)
🌋 • Recipe 2; Skillet Banana Scone-Bread (The perfect sweet-savory hybrid)
🌋 • Recipe 3; Cassava Garlic Flatbread (The ultimate grain-free savory side)
Ready to get your hands floury? Let's get baking!
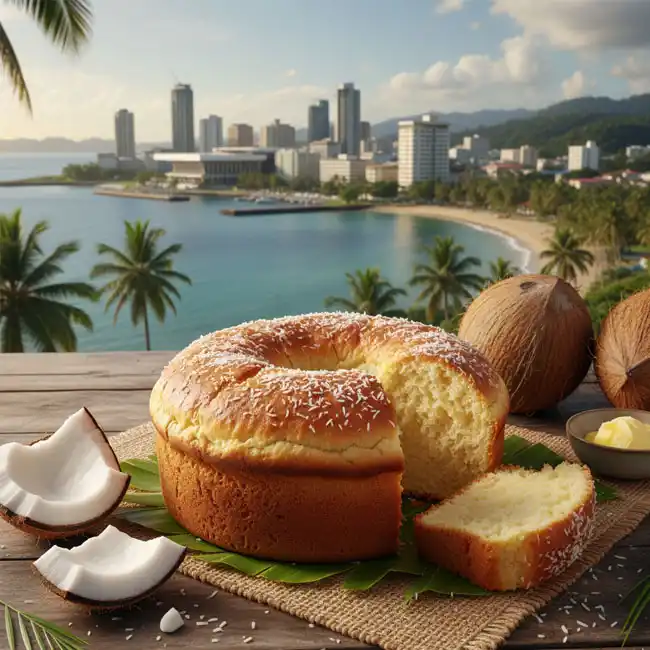
🥥 Recipe 1: Classic PNG Coconut Bread (The fluffy, tropical staple)
🍞 About this Recipe
This is the "King" of breads in Papua New Guinea. It is a dense, slightly sweet, and incredibly aromatic loaf that uses coconut milk instead of dairy. In PNG villages, this might be baked in a ground oven or over charcoal, giving it a slightly smoky crust. At home, we use a standard oven, but the result is just as magical. It’s excellent for breakfast with a bit of honey, or served alongside a savory stew to soak up all the juices.
🍞 Ingredients & Measurements
• 500 grams of All-Purpose Flour (or Bread Flour for more chew)
• 400 ml of full-fat Coconut Milk (warmed slightly)
• 100 grams of shredded Coconut (unsweetened)
• 2 teaspoons of Instant Dry Yeast
• 3 tablespoons of Coconut Sugar or Honey
• 1 teaspoon of Sea Salt
• 2 tablespoons of melted Coconut Oil
🍞 Step-by-Step Instructions
1.Activate the Yeast: In a small bowl, mix the warm coconut milk with the sugar and yeast. Let it sit for about 5 to 10 minutes until it becomes frothy. This tells you the yeast is alive and ready to work!
2.Mix the Dry: In a large mixing bowl, combine the flour, shredded coconut, and salt. Make a well in the center.
3.The Dough: Pour the yeast mixture and the melted coconut oil into the well. Start mixing with a wooden spoon until a shaggy dough forms.
4.Kneading Love: Turn the dough out onto a floured surface. Knead it for about 8 to 10 minutes. You want it to become smooth and elastic. If it’s too sticky, add a tiny bit more flour, but keep it as soft as possible.
5.First Rise: Lightly oil a bowl with coconut oil, place the dough inside, and cover it with a damp cloth. Let it rise in a warm spot for about 1 hour or until it has doubled in size.
6.Shape and Bake: Punch the dough down to release the air. Shape it into a loaf and place it in a greased loaf pan. Let it rise for another 30 minutes (the second rise makes it fluffy!).
7.The Oven: Bake at 356 degrees Fahrenheit ( 180 degrees Celsius ) for 35 to 40 minutes. The top should be golden brown and the loaf should sound hollow when you tap the bottom.
8.The Finish: Brush the top with a little extra coconut milk while hot for a beautiful sheen.
🍞 Tips & Mistakes to Avoid
• Don't use "light" coconut milk: You need the fat content from the full-fat version to keep the bread moist. Light coconut milk will result in a dry, crumbly loaf.
• Warm, not hot: Make sure the coconut milk is just lukewarm. If it’s too hot, it will kill the yeast, and your bread won't rise.
• Patience is key: Don't skip the second rise in the loaf pan. This is what gives the bread its signature "home-style" lift and prevents it from being a heavy brick.
🍞 FAQ
Q1.Can I make this vegan?
It already is! Using coconut milk and oil makes this a naturally plant-based delight.
Q2.Can I add fruit?
Yes! Adding a handful of raisins or dried mango pieces works beautifully with the coconut flavor.
🍞 Summary
Classic Coconut Bread is the heart of the PNG home. It’s hearty, fragrant, and stays moist for days. It’s the perfect introduction to island baking.

🍌 Recipe 2: Skillet Banana Scone-Bread (The perfect sweet-savory hybrid)
🍞 About this Recipe
This recipe is a bit of a "fusion" dish. It’s somewhere between a scone and a soda bread, and it’s traditionally cooked in a heavy skillet or frying pan. Because it doesn't use yeast, it’s much faster to make. In PNG, bananas are a primary source of sweetness, and in this bread, they act as both a sweetener and a moistening agent. It’s dense, slightly chewy, and absolutely perfect when served warm with a bit of butter.
🍞 Ingredients & Measurements
• 3 large, overripe Bananas (mashed)
• 3 cups of All-Purpose Flour
• 1 tablespoon of Baking Powder
• 1/2 teaspoon of Salt
• 1/4 cup of Coconut Oil (solid or semi-solid)
• 1/2 cup of Coconut Milk (you may need a little more or less)
• 1 tablespoon of Honey
🍞 Step-by-Step Instructions
1.Dry Mix: Sift the flour, baking powder, and salt into a large bowl.
2.Cut the Fat: Add the coconut oil. Use your fingertips or a fork to rub the oil into the flour until it looks like fine breadcrumbs.
3.The Wet Mix: In a separate bowl, mix the mashed bananas, honey, and coconut milk.
4.Combine: Pour the wet ingredients into the dry ingredients. Mix gently. You want a soft dough that just barely holds together. If it's too dry, add a splash more coconut milk.
5.Pat it Out: On a floured surface, pat the dough into a circle about 1 inch thick. Don't use a rolling pin—keep it rustic!
6.The Skillet: Heat a heavy-bottomed skillet (cast iron is best) over low-medium heat. Lightly grease it with coconut oil.
7.The Bake-Fry: Place the dough circle in the skillet. Cover with a lid. Cook for about 10 to 12 minutes on one side until golden brown.
8.The Flip: Carefully flip the bread over. Cover again and cook for another 10 minutes.
9.Test: Insert a skewer into the center. If it comes out clean, your scone-bread is ready!
🍞 Tips & Mistakes to Avoid
• Don't overwork the dough: Like a scone, if you knead this too much, it will become tough. Mix until "just combined."
• Low and slow heat: Since this is a thick bread cooked in a pan, if the heat is too high, the outside will burn while the inside stays raw. Keep that flame low!
• Use very ripe bananas: You want the ones that are brown and spotty. They provide the best moisture and natural sugar.
🍞 FAQ
Q1.Can I bake this in the oven instead?
Yes! Put the skillet in the oven at 392∘F or 200∘C for about 20 minutes instead of cooking on the stovetop.
Q2.Is this a dessert?
It’s only mildly sweet, so it can be eaten as a snack or even a light lunch with some cheese or fruit.
🍞 Summary
This Skillet Banana Scone-Bread is the ultimate "quick fix" for your bread cravings. It’s rustic, filling, and carries that distinct home-cooked flavor that reminds you of a cozy kitchen.
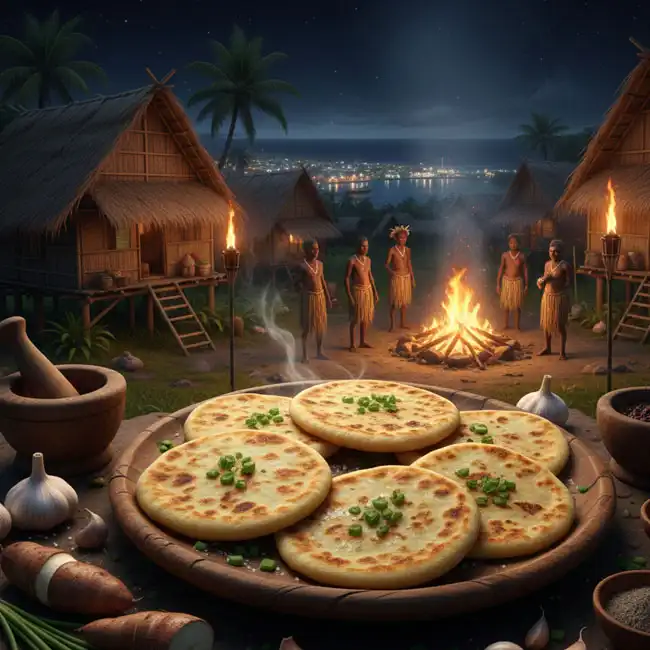
🥔 Recipe 3: Cassava Garlic Flatbread (The ultimate grain-free savory side)
🍞 About this Recipe
Cassava (also known as manioc or yuca) is a staple root crop in Papua New Guinea. This flatbread is a wonderful alternative to wheat-based breads. It is naturally gluten-free and has a fantastic, slightly gummy/chewy texture that is very addictive. We flavor this one with plenty of garlic and herbs to make it a savory powerhouse. It’s perfect for dipping into curries or using as a wrap for grilled vegetables.
🍞 Ingredients & Measurements
• 2 cups of Cassava Flour (high quality)
• 1 cup of boiling Water (the water must be hot!)
• 2 tablespoons of Olive Oil or Coconut Oil
• 3 cloves of Garlic (very finely minced)
• 1 tablespoon of fresh Parsley (chopped)
• 1/2 teaspoon of Salt
• 1/2 teaspoon of Black Pepper
🍞 Step-by-Step Instructions
1.Aromatic Oil: In a small bowl, mix the oil with the minced garlic and parsley. Set aside.
2.The Flour Base: Place the cassava flour, salt, and pepper in a heat-proof bowl.
3.The Hot Mix: Pour the boiling water into the flour while stirring constantly with a wooden spoon. The hot water "pre-cooks" the starch in the cassava, making the dough pliable.
4.Knead while Warm: Once it’s cool enough to touch, add the garlic-herb oil. Knead the dough for about 2 minutes until it’s smooth and feels like play-dough.
5.Portioning: Divide the dough into 6 equal balls.
6.Roll it Thin: Place a ball between two sheets of parchment paper and roll it out until it’s about 1/8 inch thick.
7.The Sear: Heat a dry skillet over medium-high heat. Place the flatbread in the pan. Cook for about 2 minutes until you see brown spots (bubbles) forming.
8.Flip: Flip and cook for another 1 to 2 minutes.
9.Keep Warm: As you finish each one, stack them and wrap them in a clean kitchen towel to keep them soft and pliable.
🍞 Tips & Mistakes to Avoid
• Boiling water is a must: If you use cold or lukewarm water, the cassava flour will not bind, and your flatbread will just crumble. It needs that heat to create the dough structure.
• Roll thin: If they are too thick, they can be a bit too chewy. Aim for a thin, tortilla-like consistency.
• Don't overcook: If you leave them in the pan too long, they will turn into crackers. You want them to be flexible enough to fold.
🍞 FAQ
Q1.Is this the same as Tapioca flour?
Not quite. Cassava flour uses the whole root, while Tapioca is just the starch. This recipe works best with Cassava flour.
Q2.Can I store these?
Yes, you can keep them in an airtight bag for 2 days. Just reheat them in a pan for 30 seconds to make them soft again.
🍞 Summary
This Cassava Garlic Flatbread is a game-changer for anyone looking for a savory, grain-free bread option. It’s quick to make and brings a unique Pacific texture to your dinner table.
✨ Final Thoughts
There you go, my friend! We’ve just covered the incredible world of Papua New Guinea home-style breads. From the sweet, tropical aroma of the Coconut Bread to the fast and easy Skillet Banana Scone-Bread, and the savory, gluten-free Cassava Flatbread, there is something here for every mood and every meal.
What I love about these recipes is that they are so deeply rooted in the "Signature Home Taste." They aren't about being perfect or fancy; they are about being hearty and honest. These are the kinds of breads you make when you want to feel connected to the earth and to the people you’re feeding.
I really want to encourage you to try these out. Don't be afraid if the dough feels a bit different than what you're used to—working with coconut and root flours is a fun learning experience!
Maybe start with the Coconut Bread this weekend. It will make your house smell like an island paradise, and I promise your family will be asking for seconds before the first loaf is even cool. Once you've tried one, come back and let me know how it went! Did you find the textures interesting? Which one was your favorite?
Baking is a journey, and I’m so happy I could share this tropical chapter with you. Enjoy every bite, and happy baking!
| 🇵🇬 🍞 < Back |